I will be using MacOS Catalina 10.15.6 for this tutorial, complexity level: Medium, time required: 30 minutes
01. Sign-up for Oracle Cloud Infrastructure Free Tier
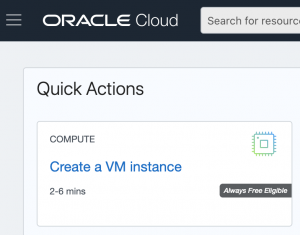
02. Create a new Compute (VM) Instance
03. Choose a name for your virtual machine and select as OS Image: Canonical Ubuntu 18.04


04. Save the Private and the Public Keys and create Create

05. after a few seconds the Public IP Address will be allocated and you need to copy that in order to connect (SSH) to the machine, in my case: 130.61.120.230

06. Rename the Private key from: ssh-key-20xx-xx-xx.key to WireGuard.key and set 700 in file Permissions

07. Move the file WireGuard.key to this location: SSD->Users->YourUser->.ssh (hidden folder)
08. Command + Space to open SpotLight Search, open Terminal and type: ssh-add -K ~/.ssh/WireGuard.key
MacBook:~ YourUser$ ssh-add -K ~/.ssh/WireGuard.key
Identity added: /Users/YourUser/.ssh/WireGuard.key (/Users/YourUser/.ssh/WireGuard.key)
09. using terminal let’s SSH into our newly created vm: ssh [email protected]

10. run the following command: curl -L https://install.pivpn.io | bash
11. Follow the steps and at this point select user: ubuntu

12. Choose WireGuard Server

13. Select the default WireGuard port: 51820

14. as DNS Provider select: PiVPN-is-local-DNS

15. Select Public IP as connection method to the server: 130.61.120.230

16. enable unattended-upgrades for the server.

17. Restart the server as requested by the wizard.
18. Return to the Oracle cloud interface and select: Oracle Cloud -> Core Infrastructure -> Compute -> Instances

19. Select view instance details:

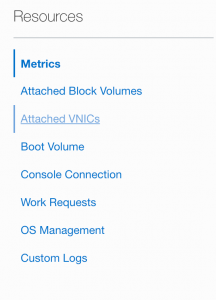
20. Scroll down, left pane (Resources), select Attached VNICs
21. Select Edit VNIC

22. Check “Skip source/destination check” and Save Changes

23. Scroll back up and click on the Public Subnet from the Primary VNIC section

24. Here scroll down to Security Lists Section and click on “Default Security List for vcn-20201005-1826” and Click “Add Ingress Rules”

25. Here fill in Source Type: CIDR | Source CIDR: 0.0.0.0/0 | IP Protocol: UDP | Destination Port: 51820| Description: WireGuard UDP and click the blue “Add Ingress Rules” button.

26. Now we switch back to terminal as we need to modify the configuration file for PiVPN “wg0.conf”
$ sudo nano /etc/wireguard/wg0.conf

27. ##########################
# Example File Structure:
[Interface]
Address = 10.6.0.1/24
PrivateKey = yIdGG4LY3SVN0fYp6DIZaNdsn7nvqZUWUk0xDpR/0lc=
ListenPort = 51820
PostUp = iptables -A FORWARD -i %i -j ACCEPT; iptables -A FORWARD -o %i -j ACCEPT; iptables -t nat -A POSTROUTING -o eth0 -j MASQUERADE
PostDown = iptables -D FORWARD -i %i -j ACCEPT; iptables -D FORWARD -o %i -j ACCEPT; iptables -t nat -D POSTROUTING -o eth0 -j MASQUERADE
#[Peer]
# # NAME OF CLIENT
#PublicKey = <CLIENT’S PUBLIC KEY>
#AllowedIPs = XXX.XXX.XXX.XXX/32
####################
28. Save the config file by pressing Control+X and then Y then [ENTER]
29. Now just restart WireGuard like so:
$ sudo wg-quick down wg0
$ sudo wg-quick up wg0
30. Make Sure WireGuard Starts on Boot:
$ sudo systemctl enable [email protected]
$ sudo systemctl restart [email protected]
31. Adding a Client Configuration for my phone xsMax: $ pivpn add

32. A review of the config file after adding the first client

33. get QR code for your mobile phone client: $ pivpn -qr

34. tutorial inspired from Medium
35. Ho to configure the WireGuard client on MacOS